

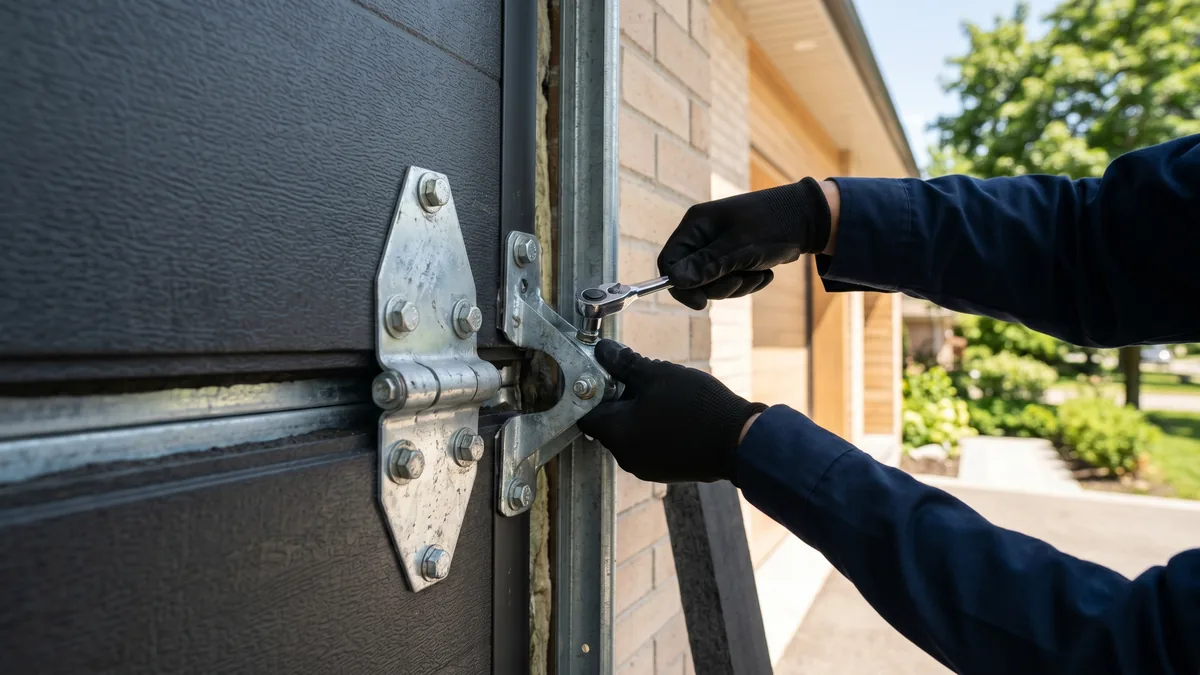
If your garage door creaks, sags, or feels stiff at the joints, the problem usually isn’t the opener — it’s the hinges. This guide walks you through every hinge type, the right sizes for your door, how to install them safely, and when to replace them, so you can fix the issue yourself or know exactly what to ask a technician.
Garage door hinges are small parts, but they carry enormous responsibility. Every time your door opens or closes, the hinges absorb the stress of the panels bending around the track curve. A worn or mismatched hinge doesn’t just cause noise — it accelerates wear on rollers, tracks, and even the opener motor. Understanding hinges properly can save you hundreds of dollars in avoidable repairs.
What Are Garage Door Hinges and Why They Matter
Garage door hinges are the metal brackets that connect individual door panels together, allowing the door to flex as it travels along the curved section of the track. Without them, a sectional garage door simply couldn’t bend enough to move from vertical to horizontal.
Each hinge has a barrel (where the roller stem inserts) and a set of leaves (the flat metal wings bolted to the panels). As the door moves, hinges rotate slightly with every cycle — which is why they wear out faster than almost any other door component.
Types of Garage Door Hinges
Garage door hinges are numbered based on their position on the door, and each number has a slightly different design suited to the amount of bend required at that spot.
- 1 Hinges – Mounted at the very top or bottom panel edge; flat with no roller stem hole.
- 2 and 3 Hinges – Middle-of-door hinges with progressively wider leaf spreads to handle more curvature.
- 4 Hinges – Positioned near the top of the door, closest to the horizontal track, handling the sharpest bend.
- Corner Hinges – Combine a hinge and a bracket, often used on the top panel where the door attaches to the track roller assembly.
Some manufacturers also offer heavy-duty hinges for insulated or oversized doors, and self-lubricating hinges designed to reduce maintenance frequency.
Garage Door Hinge Sizes: How to Choose the Right One
Hinge size isn’t arbitrary — it’s tied to the gauge (thickness) of your door panel and the hinge’s position number.
- Panel Thickness: Standard residential doors use 18–24 gauge steel; thicker panels need heavier-gauge hinges.
- Hinge Number: Always match replacement hinges to their exact position (a 3 in a 4 slot will bend incorrectly).
- Roller Stem Diameter: Most residential doors use 7-inch stems with either 1⅜” or 2″ diameter rollers — hinge holes must match.
- Door Width: Wider doors (16 ft+) typically require reinforced hinges to handle extra torque.
Buying the wrong size hinge is one of the most common DIY mistakes — it looks like it fits, but it changes the bending geometry and causes premature roller failure.
Signs Your Garage Door Hinges Need Replacement
Hinges rarely fail without warning. Catching these signs early prevents a stuck or collapsed door.
- Loud grinding or metallic squeaking during operation
- Visible rust, pitting, or metal fatigue cracks on the leaf
- Door appears crooked or uneven when closing
- Excessive play or wobble at the hinge joint
- Panels separating slightly at the seams
If you notice two or more of these signs, it’s time to inspect — and likely replace — the affected hinges before they fail completely.
Tools You’ll Need Before Starting
Before removing any hinge, gather the right tools so the job goes smoothly and safely.
- Socket wrench set (typically 7/16″ and 1/2″)
- Vice grips or locking pliers (to secure the door in place)
- Replacement hinges matching your door’s gauge and position
- Work gloves and safety glasses
- A helper (garage doors are heavy and spring-loaded)
Step-by-Step Garage Door Hinge Installation
Installing a new hinge is straightforward once the door is properly secured. Never attempt this with the door only partially open, since spring tension can cause sudden movement.
- Secure the door fully closed, or clamp vice grips on the track below a roller to prevent movement.
- Disconnect the opener to avoid accidental activation during the repair.
- Remove the roller from the hinge you’re replacing by sliding it out of the track slightly.
- Unbolt the damaged hinge using your socket wrench, supporting the panel so it doesn’t shift.
- Position the new hinge, aligning bolt holes exactly with the factory-drilled holes.
- Tighten bolts evenly, then reinsert the roller stem into the hinge barrel.
- Test manually by moving the door a few inches before reconnecting the opener.
Replacing vs. Repairing: Which Makes Sense?
Not every worn hinge needs a full replacement — sometimes lubrication or minor adjustment is enough.
Repair when:
- The hinge is only squeaking, not cracked
- There’s minor surface rust with no structural pitting
- The door still closes evenly
Replace when:
- You see visible cracks or bent leaves
- The hinge hole is elongated from wear (roller wobbles)
- Multiple hinges on one panel show fatigue simultaneously
Pros and Cons of DIY Hinge Replacement
| Pros | Cons |
|---|---|
| Saves on labor costs | Risk of injury from spring tension |
| Can be done in under an hour per hinge | Wrong hinge size causes bigger damage |
| Builds long-term maintenance knowledge | No warranty coverage if something goes wrong |
| Parts are inexpensive and widely available | Time-consuming without the right tools |
If your garage door has high-tension torsion springs or you’re uncomfortable working near them, it’s safer to call a professional technician for hinge replacement.
Maintenance Tips to Extend Hinge Life

A few minutes of maintenance every few months can double the lifespan of your hinges.
- Lubricate hinges every 3–6 months with silicone-based garage door lubricant (avoid WD-40 for long-term use, as it attracts dust)
- Tighten loose bolts during routine inspections
- Keep the track clean and free of debris that strains hinge movement
- Check hinge alignment after any door impact (like a car bump)
Cost of Garage Door Hinge Replacement
Hinge costs vary based on material quality and whether you hire a professional.
- DIY hinge cost: $5–$25 per hinge depending on gauge and brand
- Professional installation: $75–$150 per visit, often including inspection of rollers and tracks
- Full hinge set replacement: $150–$400 for an entire door, parts and labor included
Investing in slightly higher-quality hinges upfront often costs less over time than repeatedly replacing cheap, thin-gauge versions.
FAQ’s
Q1. How often should garage door hinges be replaced?
Most hinges last 7–10 years with regular use and proper lubrication, though heavy daily use can shorten that lifespan.
Q2. Can I replace just one hinge instead of the whole set?
Yes — hinges can be replaced individually as needed; there’s no requirement to replace them all at once unless several show wear simultaneously.
Q3. Are all garage door hinges the same size?
No, hinge size and design vary by position number (1 through 4) and by the gauge of your specific door panels.
Conclusion
Garage door hinges may be small, but they play a massive role in how smoothly and safely your door operates every single day. Knowing the different types, choosing the correct size, and recognizing early warning signs of wear can save you from costly repairs — or a door that jams shut when you least expect it. Whether you tackle the replacement yourself or bring in a professional, regular hinge maintenance is one of the easiest ways to extend your garage door’s lifespan.
